Adding a client looks like the most harmless form in the whole platform: a few fields and save. It isn’t. What you type here decides how the site will be named on every screen from now on, where the map pin lands for dispatch and patrols, and whether the client gets a welcome email the moment you hit save. Those choices follow the account for the life of the contract.
This guide walks the whole thing, field by field, with a screenshot of every step and a note on what happens behind each one.
Before you start
You need two things.
Permission to create clients. If your role doesn’t have it, the button simply isn’t there — the platform hides what you can’t do instead of letting you fill in a form and fail at the end.
The minimum data at hand. It’s a short list, but the form won’t save without it: the company’s tax identifier, the legal representative’s name and contact details, an email and a phone for the account, and the address with its postal code. Everything else — contract dates, internal code, risk level, logo — can wait.
Step 1 · Clients → New client
In the sidebar, open Clients. The New client button sits at the top right.
This is also the screen you’ll live in afterwards: search, filter, see who has actually signed in to the app — the No access, Invited and In app badges — and switch between the card and list views.
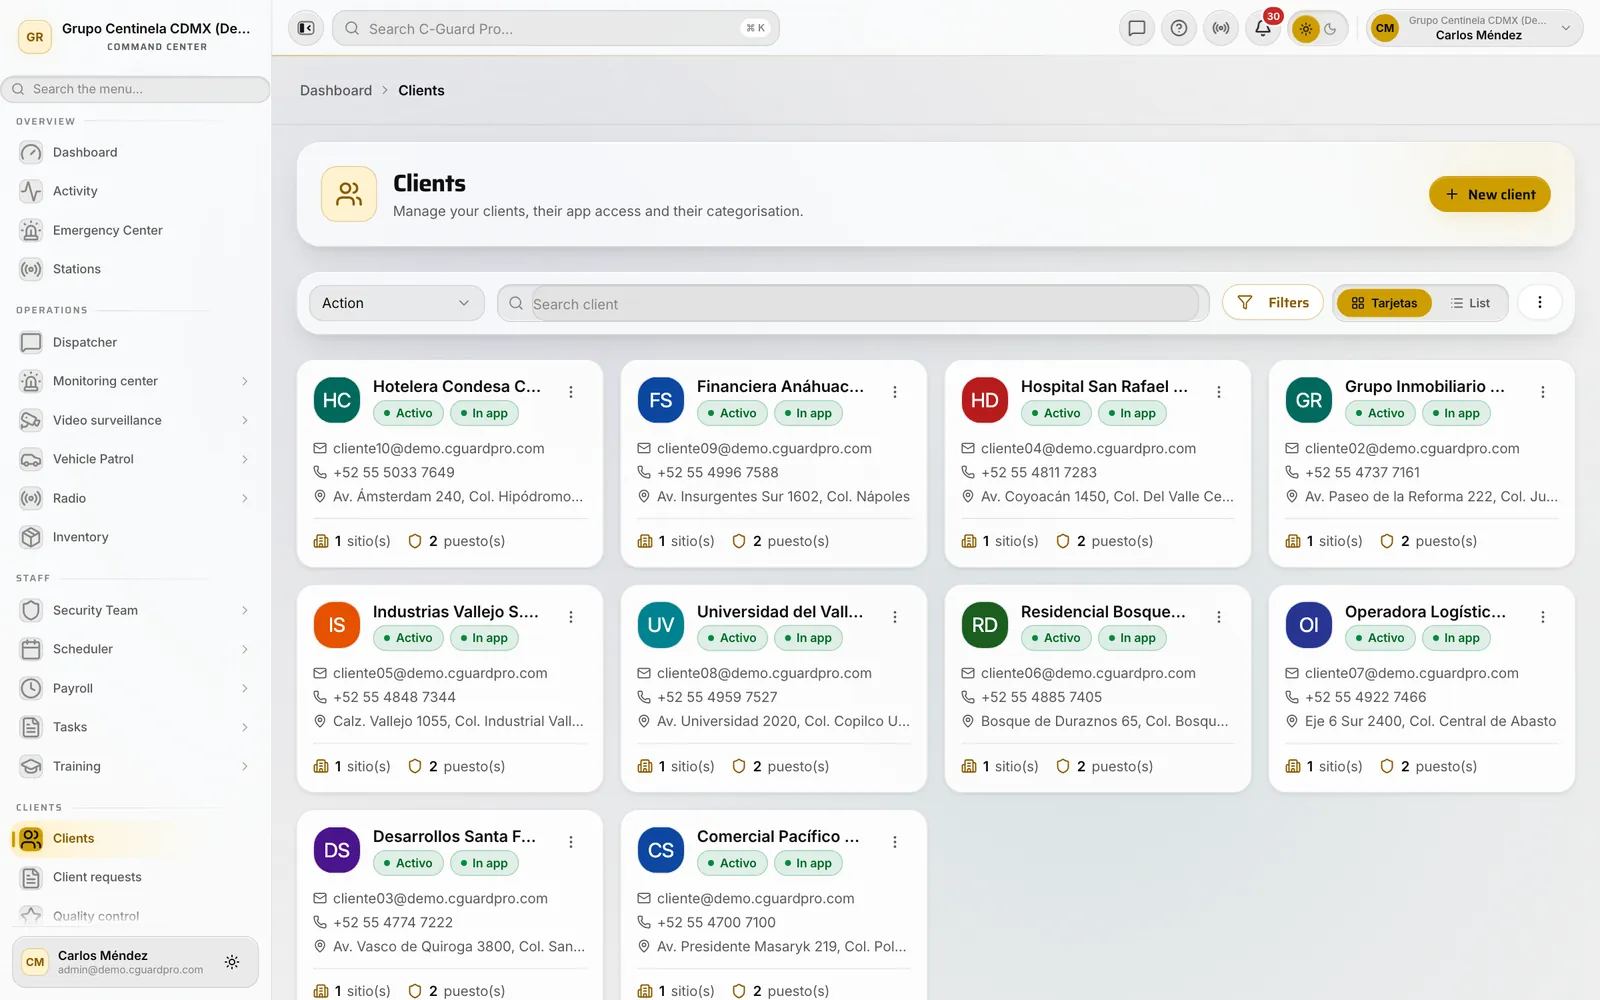 This is where the account is born, and where you come back to it once it exists.
Step 2 · Client type and identification
The first question is whether the client is an individual or a company. It isn’t a label: it changes which document you’re asked for next and the format that gets validated.
And the document is called what it’s called in the client’s country: EIN in the United States, VAT number in the UK, NIP in Poland, RFC in Mexico, RUC in Ecuador and Peru. The platform takes it from the client’s country and, until you’ve typed that, from your own company’s. For a country whose format we don’t model, it doesn’t invent a rule: it asks for something that looks like an identifier and lets you carry on.
Below it go the legal representative’s details — first name, last name, personal phone, personal email and ID document. Keep the distinction straight, because it’s the one people get wrong: these belong to the person who signs. The account’s own email and phone come further down, in the contact section, and can perfectly well be the front desk’s.
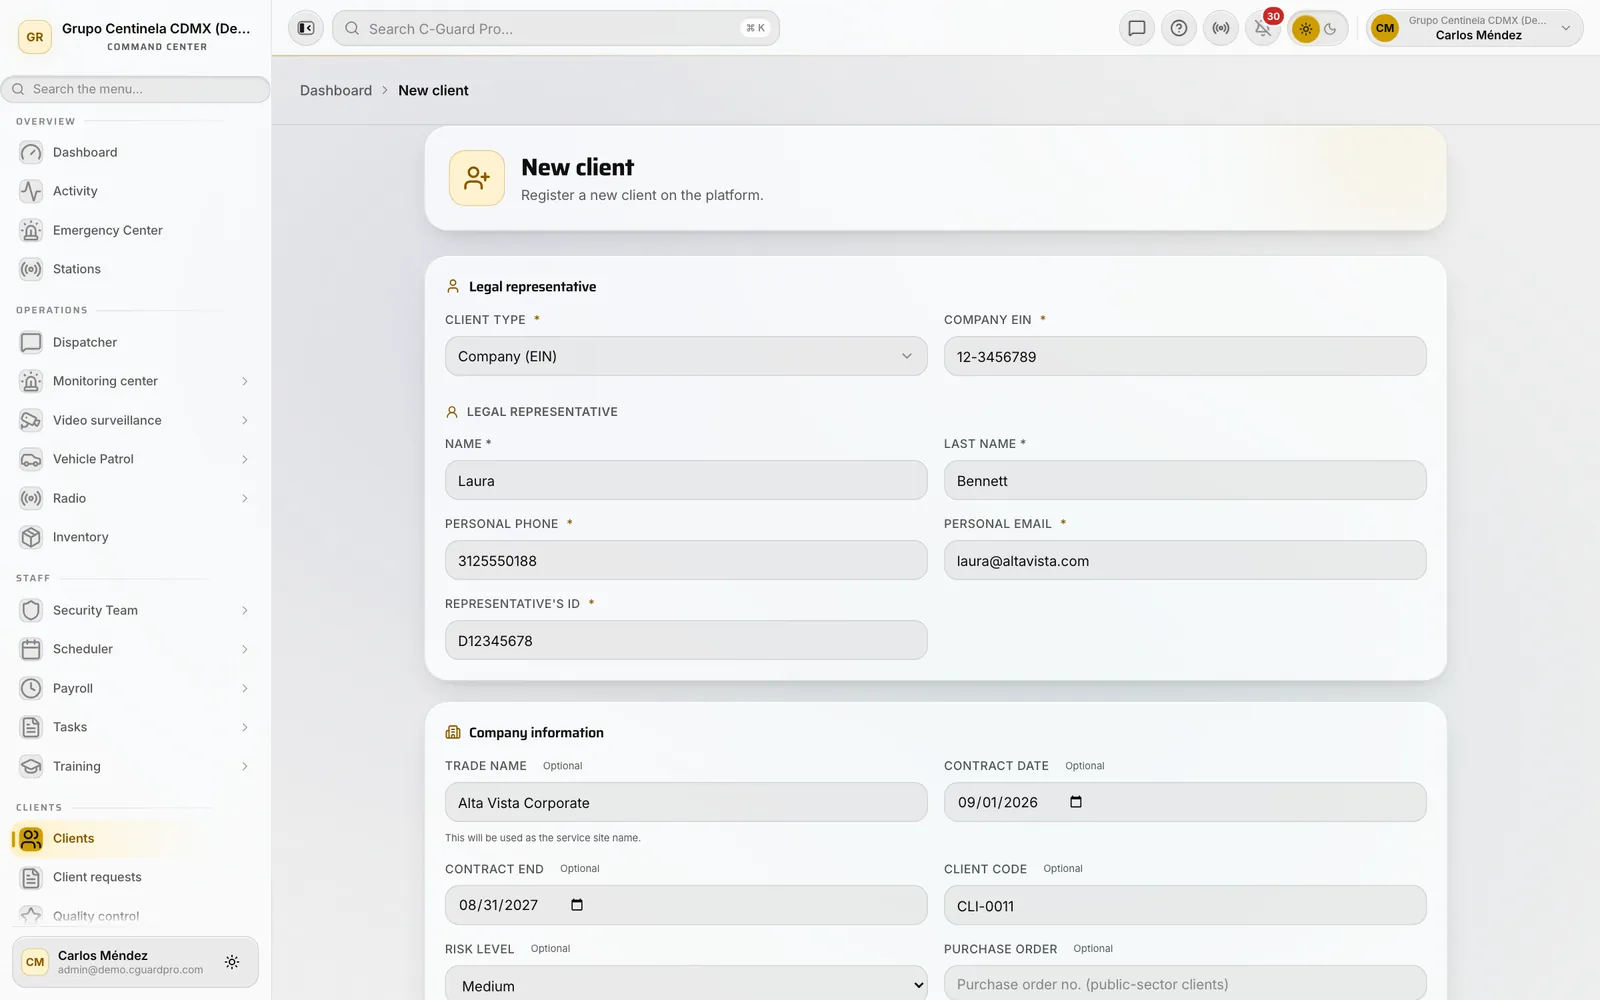 The client type decides which document is requested and how it is checked.
Step 3 · Company information
One field here does far more than it appears to: the trading name. That text names the service site created automatically when you save, and it’s what shows on the map, in reports and in the guard’s app. Leave it blank and the site inherits the representative’s first and last name — which is how you end up with an office tower named after a person.
The rest of the section is optional and still worth filling in on day one:
- Contract start and end dates — the only way renewals stop arriving as surprises.
- Client code — the one you already use for invoicing. It saves a mental translation at every reconciliation.
- Risk level — low, medium or high. It’s what sorts the list once you have a hundred accounts.
- Purchase order — for public bodies that contract through a PO rather than a direct contract.
- Logo and site photo — the site photo is the one a new guard thanks you for when they arrive at a building they’ve never seen.
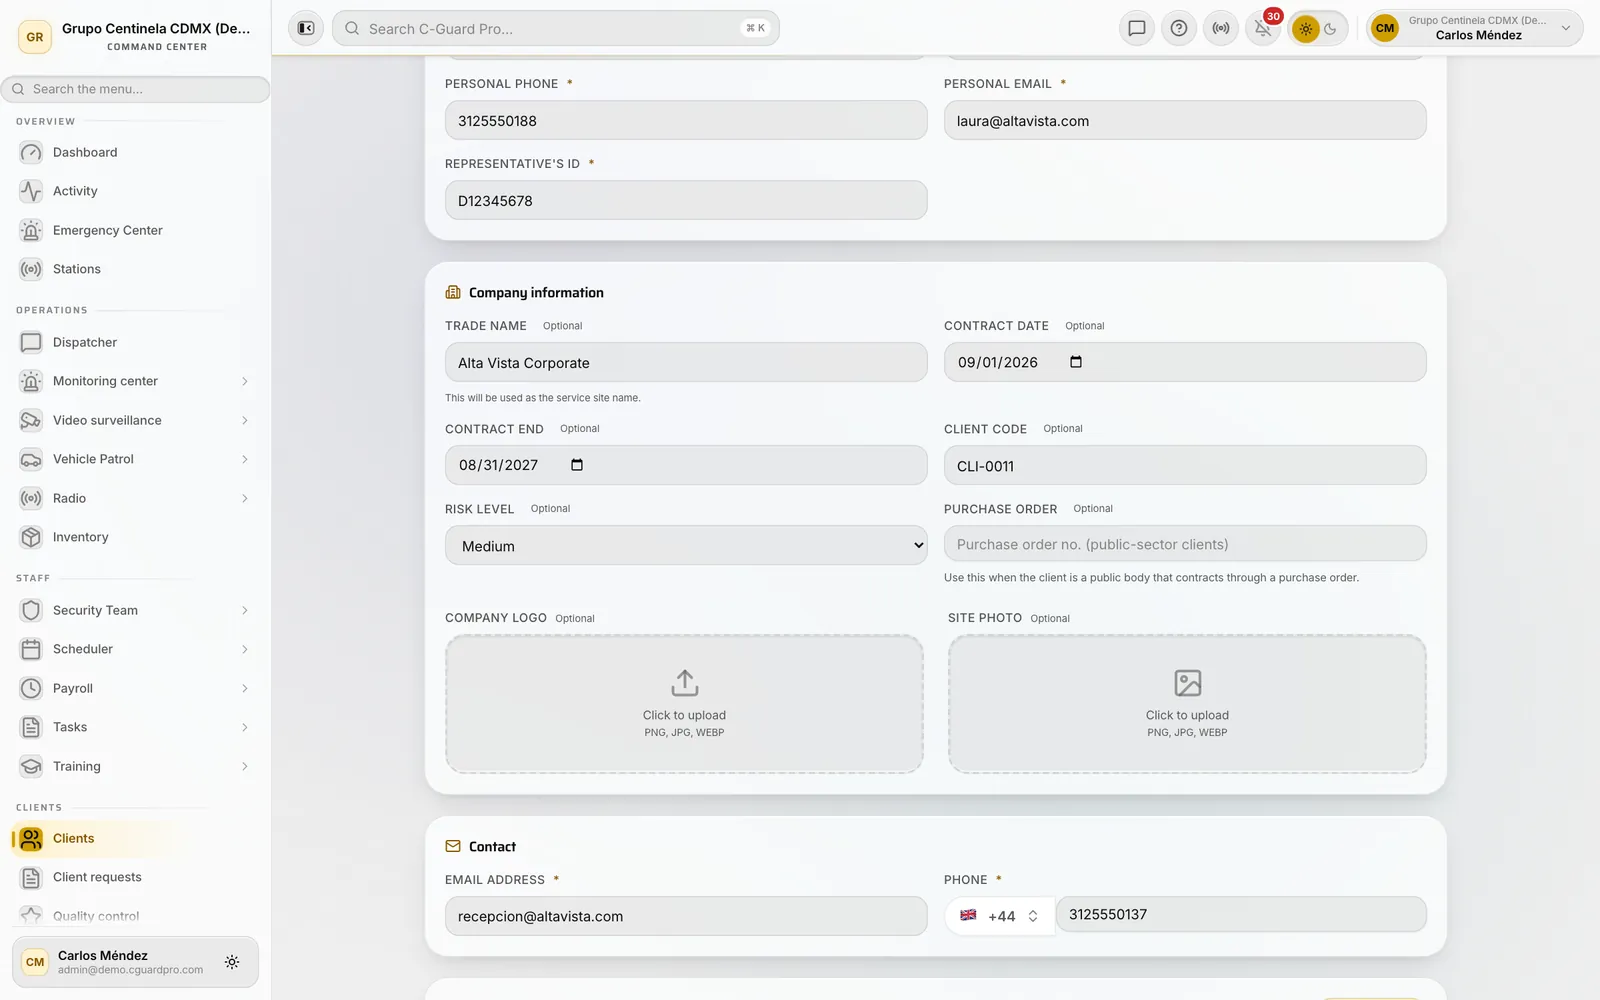 The trading name isn’t cosmetic: it’s the name the site will be born with.
Step 4 · Contact, and who else gets into the app
The email and phone in this section are required, and the email has an immediate consequence: if your company keeps the Client welcome notice switched on in email preferences, saving sends that welcome message automatically, and the client activates their access from it. Nothing else to do. If you’d rather control the timing, turn that notice off and the account stays at No access until you invite them by hand.
Right below sits Additional access people. It’s for others at the same company who need to see the service: the head of security, the building manager, whoever covers nights. Each person you add here with their own email gets their own login, not a shared credential.
It’s the step most often skipped and the one that prevents the most trouble: when three people share one user, the session throws them out of each other and nobody can tell who saw what. The full access model is in the guide on giving clients access to the Mi Seguridad app.
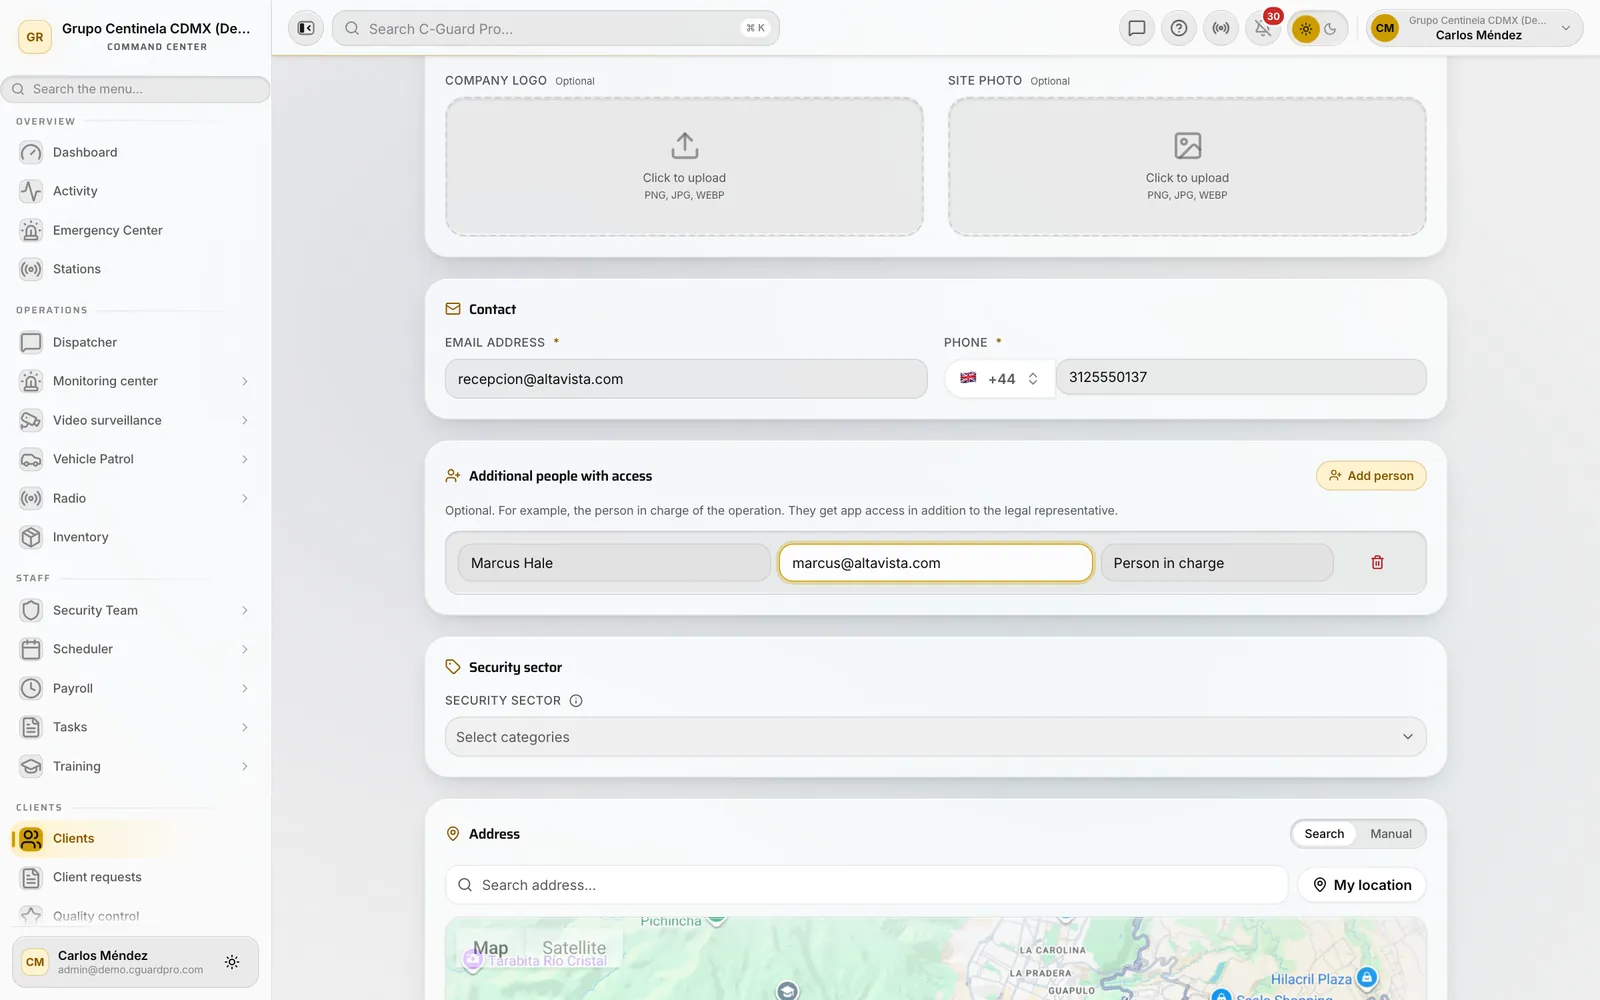 Everyone with their own access; the main contact isn’t the only one who can log in.
Step 5 · The address and the pin
The address block has two modes. Search is the one to use: type the street, pick the suggestion, and the system fills the address, postal code, city, country and — the part that matters — the coordinates. Manual exists for addresses no search engine knows: a farm, a stretch of road, a warehouse finished last month.
Check the pin before moving on. You can drag it to the exact spot. That coordinate pair travels to the site created with the client, and from then on it’s the reference for where that client sits on the operations map. A pin dropped “roughly” on the next block costs you nothing on day one; it costs you the day someone looks for a guard on the map and finds them two hundred metres from where they are.
Address line 2 is for the floor, tower or suite. Keep it separate: line 1 is what geolocates, line 2 is what gets someone to the right door.
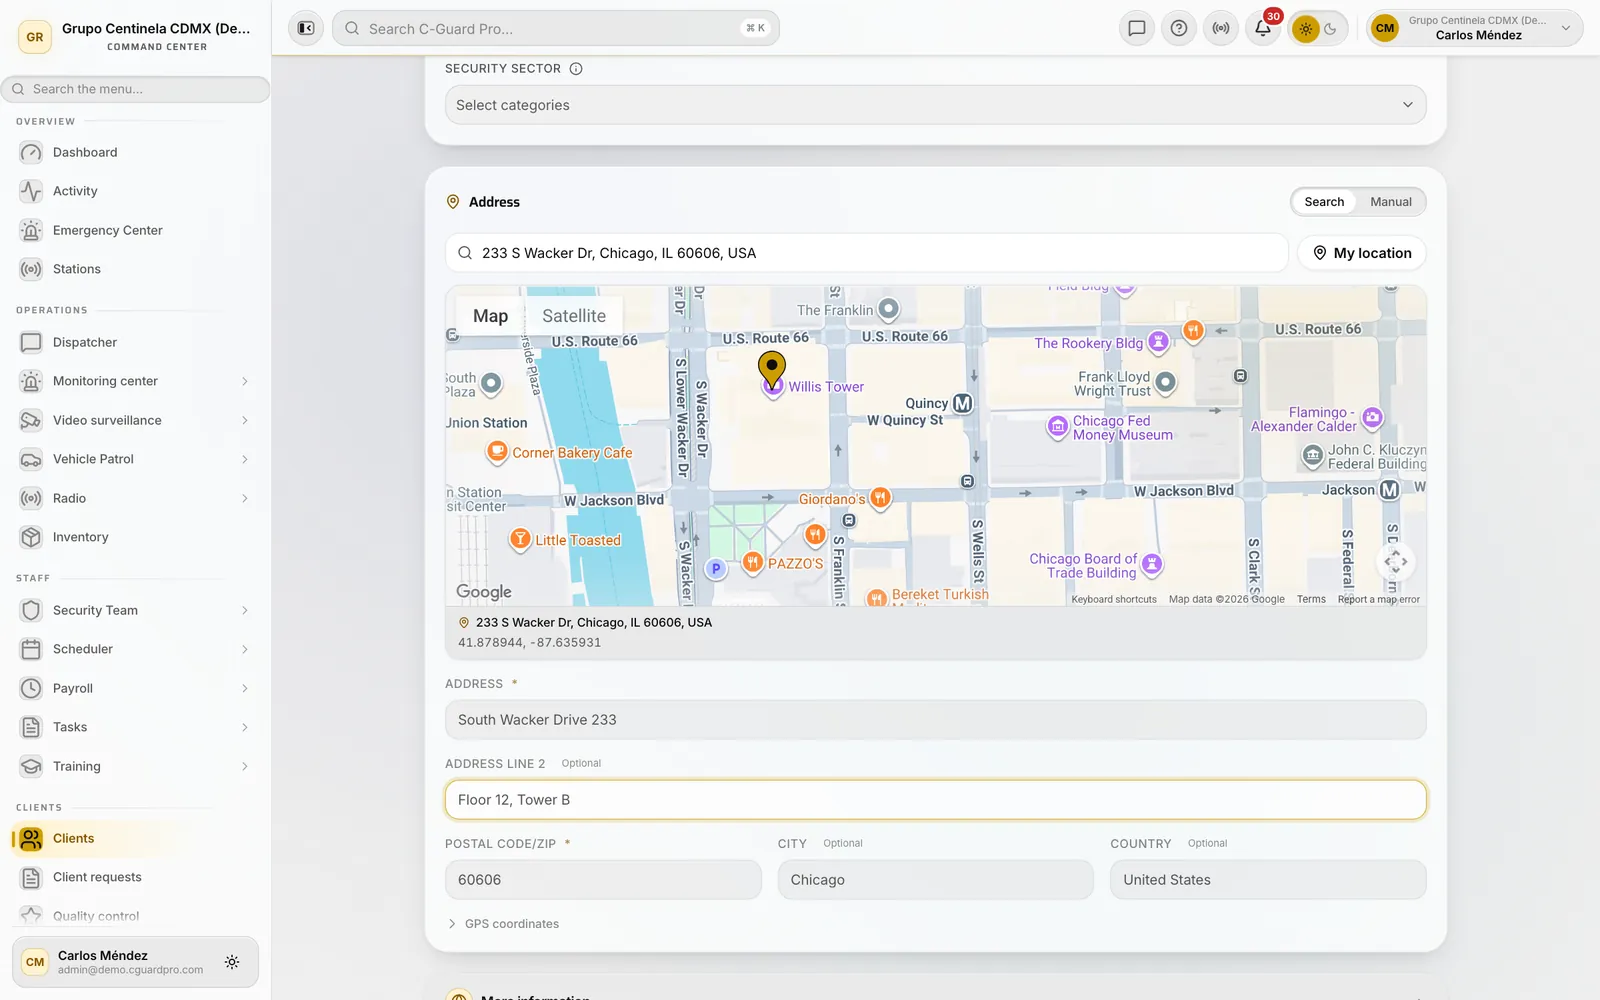 Search fills the fields and drops the pin; dragging it is what makes it exact.
Step 6 · Save, and what happens underneath
Pressing Save does three things at once, and it pays to know them:
- The client is created.
- Its first site is created with the same data — trading name, address, coordinates, phone, email and sector — so you don’t type it twice.
- The welcome email goes out if there’s an address and the notice is enabled, and the client’s status moves to Invited.
What does not happen is the rest of the operation. The message you get on save says so plainly: the service still has to be configured before you create stations and assign guards. Adding the client opens the file; it doesn’t staff the site.
The email does have to be unique within your company: if another client already uses it, the system doesn’t quietly create a twin — it warns you and takes you to the existing record. The phone number, by contrast, is allowed to repeat on purpose, because several sites can hang off the same switchboard.
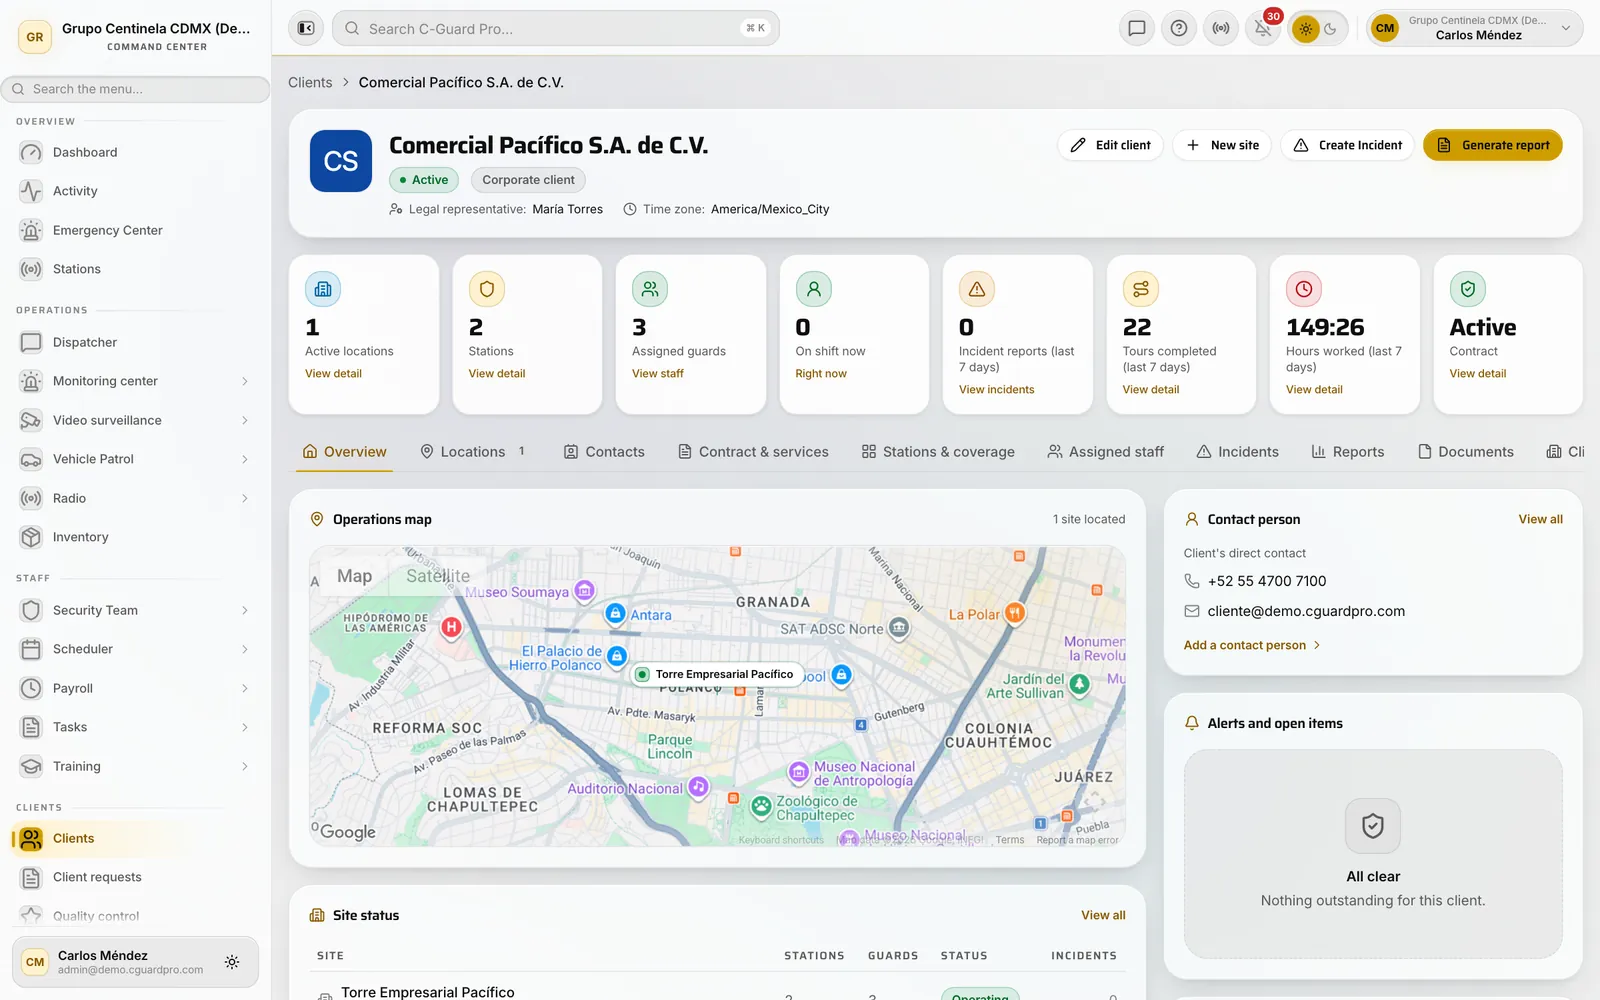 The file is the starting point for everything else: locations and stations, contract, coverage, portal and access.
When there are many: bulk import
Retyping fifty accounts makes no sense. On the same Clients screen, the actions menu has Import: download the template, fill it in a spreadsheet and upload the .xlsx, .xls or .csv.
Advice from anyone who has migrated data before: import three test rows first, look at how they landed, and only then upload the other forty-seven. Fixing three badly mapped records takes a minute; fixing fifty takes an afternoon.
Common mistakes
“It won’t save” and you can’t see why. It’s almost always the postal code or the tax identifier. Scroll back to the top of the form: the offending field is flagged.
The site is named after a person. You saved without a trading name. Editing the client fixes the client, but the site that already exists keeps its name — check that too.
The client says nothing arrived. Look at the badge in the list. No access means the welcome notice was off and you need to invite them manually. Invited means the email went out: have them check the spam folder.
It won’t save: duplicate email. That address already belongs to another client. The warning takes you to the existing record — look at it before inventing an email variant, because it’s usually the same client added twice.
What to do immediately afterwards
Adding the client is the first of four steps. The other three, in order:
- Define the service at the site — what is provided, with what equipment, on what hours.
- Create the stations and assign the shifts, which is where coverage is actually decided (guard scheduling).
- Lay out the patrol routes if the service includes them (QR guard tour system) and open the client portal so they can see what they pay for.
Do that and the account stops being a record and becomes an operation you can measure.
If you’d like to see it with your own clients before deciding, explore CGuardPro or get in touch and we’ll set it up with you.